When Terry and I were scoping out new houses, a place for a playroom for our kids was on the top of our priority list. We really wanted the kids to have a place of their own, a place for all of their toys and a space where toys could live which wasn't our main living room. But once we found our house I found myself trying to somehow transform this extra living space into a playroom/adult living room. I put my fancy Pier One silk pillows on the couch, added breakable vases on top of the piano and searched out beautiful artwork for the wall...while the rest of the room filled up with kids toys.
But clearly, I realized very quickly that this just wasn't going to work. It was supposed to be their space. Their space where they could use the pillows on the couch as beds for their baby dolls, a space where the artwork represented them, and a fun colourful space which they could call their own. The vases came down--I stopped looking for beautiful artwork, and the fancy pillows now sit all pretty on Terry's and my bed. This was now officially a kid zone--and I wanted the decor to reflect that.
So I stepped out of my comfort zone of neutral colours and decided to just go for it--adding lots of colours, bold patterns and comfy pillows that are completely kid friendly. But I was missing something for the kids to sit on, drive cars on and put their feet up on while they hang out on the couch reading stories.
An ottoman.
But if you've ever gone ottoman shopping before, you know how difficult it is to find something within a reasonable price range and which matches the specific colours of your space. I found myself flipping price tags over and being shocked at the $250-$300 price tags--and I was even more disappointed that I couldn't find something in the colour that matched my pillows and colours of the room. So, I figured I'd just make my own.
But you see...I get these great ideas as if I actually know what I'm doing. But I really have no clue.
So I spent a lot of time researching how to make one of these suckers--what type of fabric to use, what tools I'd need, etc etc. And then a few weeks later...
voila!


My very own DIY ottoman. With tufted buttons to boot!

It's bold. It's got a funky pattern. It's a strong, kid-friendly (aka wipeable) fabric. It has cute little buttons that I made myself and a it's soft and comfy--so perfect for toddlers who are learning how to walk.


And the pillows? Well, the green one is from BouClair, and if you remember from last year when I made my own bench cushion, I also made this pillow to go on top--so I stole it for our playroom and picked a fabric almost identical to my bench cushion fabric so that it would coordinate once again.


But before I go ahead and bore you with the details of how to make this thing...I figured I'd provide you a bit of playroom inspiration...on the cheap, and totally kid-friendly.

So after deciding on the colours of our couch cushions and ottomon, I headed to Ikea and bought these simple white (empty) frames. They were only $7 each. Then I got my dad (who is in the sign business) to create these images--ABC's, polka dots and Playroom Rules...all in the exact colours of the room. Perfect. And in total, it only cost me about $38 for the artwork. If you don't have a dad in the sign business though--you can easily take images off of the internet and play with them until you get what you want, then take them to a sign shop and have them print them for you. Much much cheaper than buying framed artwork yourself from a store--and you get exactly the colours and images that you want.


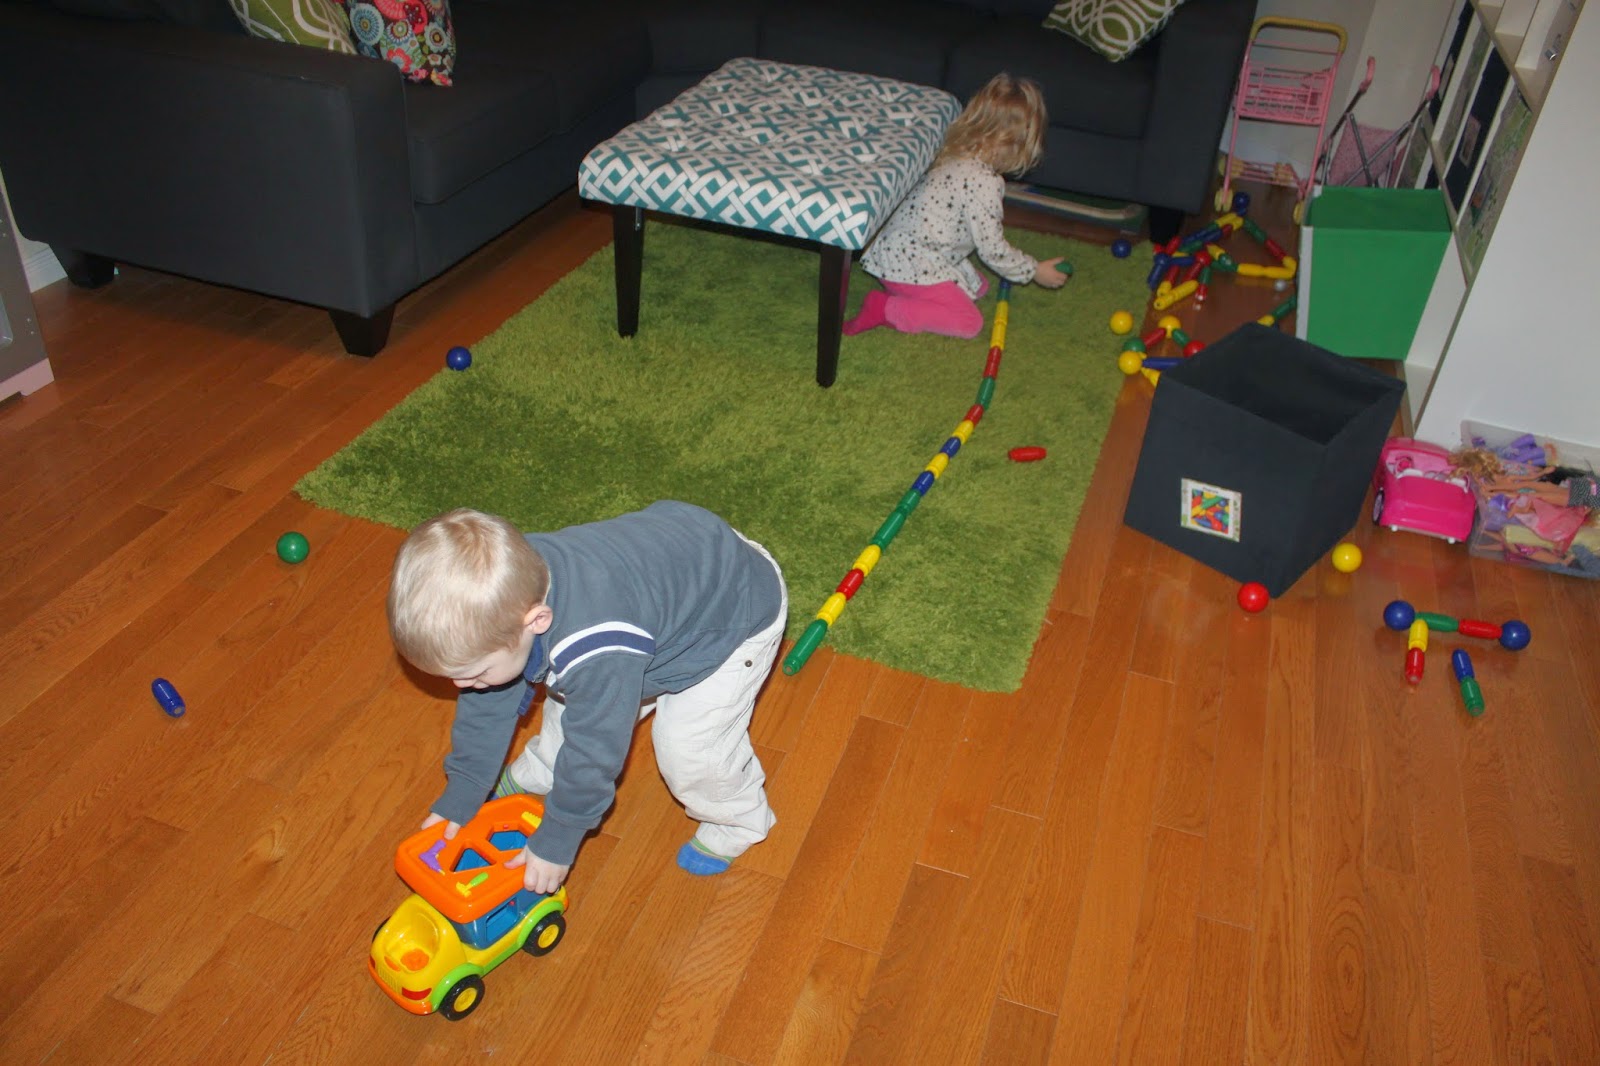
This is Mya's favourite space of the entire room. She'll spend hours here each day drawing, colouring, and making crafts...with everything at her finger tips.


SO...if you want to make your own DIY ottoman, here you go...step by step instructions, from my house to yours:
*******
Go to Home Depot and buy a piece of their scrap plywood (this piece cost us a whole $3). Then buy some table legs at any hardware store (I bartered at an overstock hardware store for these and talked them down to selling these to me for only 50 cents each). It's always worth asking.
But if you don't want to make your own table, just use an old coffee table from a thrift store--works well too.

Glue and screw the legs onto the bottom of the table top, then add simple, small brackets to help to support little people who will surely jump on this thing and roll all over it.


Buy some 3inch foam from any fabric store and cut it down to size (I used a bread knife and measuring tape--drew a line with a marker onto it, then cut it...and it worked perfectly).
Using spray glue or a hot glue gun, attach the foam to the board (use only a bit of glue from your glue gun--a few dots and strips of glue along the edges and in the middle).

Then spend a ridiculous amount of time, and shoot yourself in the foot trying to get the math right for where you should be placing each of your buttons...and use a marker on the back of the table to mark your spots.

Then buy some batting from a fabric store, cut it to size and staple it under the table top...pulling it tightly.

This is what it will look like when you are finished stapling the batting all around.

After ironing your fabric, flip the table over and start stapling the fabric tightly around the edges of the table--pulling really tightly as you go.


When you get to a corner, spend the time to carefully fold the edge over and line it up perfectly with the original line of the foam, then quickly staple it down tightly.


Aren't they adorable??

So then get some super long needles from a fabric store, and use some strong string to thread the needle..then from the back of the table, thread it up and through the wood, through the foam, and through the fabric...then add your button and try with all of your might to thread the needle back down through the fabric, foam and wood until it comes out the back of the table...
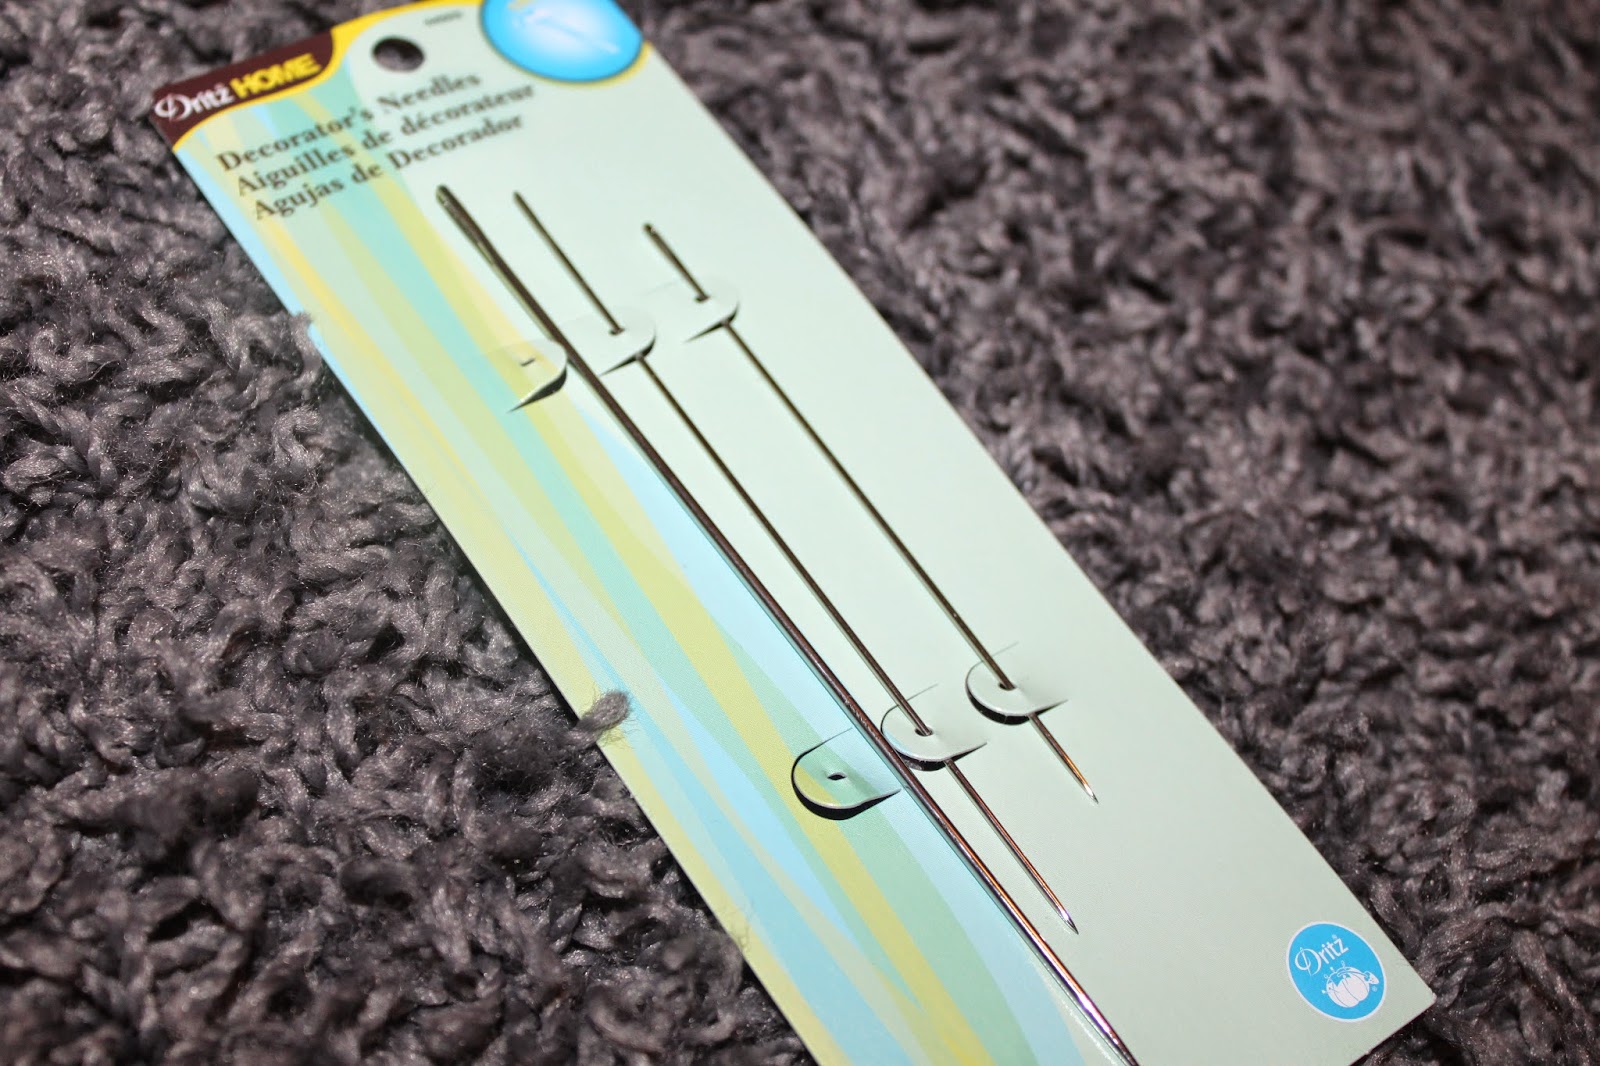
then tie the string around a washer to keep it snug and in place.

Then once you've pulled your hair out finally getting all those buttons in place..you'll finally have your funky ottoman...all done!!


Give it a try.
Happy last week of school everyone!
Erica xo

No comments:
Post a Comment