Friday 29 January 2016

Baby proof your fireplace or tables for under $4!


Our baby is on the move. 

You turn your back and she's gone. 

You put her down in one place, and the next moment she is trying to scale my stairs. 

She is a pint-size crawling explorer with no limits and no fear. So Sophia-proofing our house has officially begun.

And the scariest place that we decided to start with was none other than our fireplace. 
Remember our fireplace that we spruced up and transformed a while back? Well, it's all pretty and nice to look at now, but it scares the heck out of me when it comes to babies. Those sharp, rough brick edges and my sweet baby's little face and head?...ya, gives me nightmares. 

So I started searching for solutions. Solutions that would cover those sharp edges and save my sweet baby from certain harm. 

BUT--I had no idea that what I would find would cost me over $40 and essentially be some not-so-soft foam that is wrapped around those sharp edges, sold in pretty packages, found at places like Babies R' Us. 

So I went on a hunt for something different. Something cheaper. Something softer. 

And...and I found it. 


For all of $2 each, you can head on over to your local hardware store (like Lowes or Home Depot) and pick up two of those insulated foam pipes with the adhesive already on it, and you've got yourself some cushy, soft, baby-proofing done on the cheap. 


The great thing about these foam pipes is that they already come with adhesive on them, so you can easily stick them to whatever you want and they'll actually stay put. Have a coffee table with sharp edges? These would work too. Have side tables with sharp edges? This will do the trick. (*just be sure to do a test patch first on your furniture to make sure the adhesive comes off without doing any damage).


The other great thing that I love about these foam pipes is that they spread out way more than the expensive fireplace foam from Babies R Us, so more of the sharp edges are actually protected. And the bonus? They come in grey--so it coordinates with the rest of my living room colours (which is what I tell myself every time that I look at it and cringe at how ugly baby-proofing my house actually looks)...but clearly, completely necessary and absolutely worth it. Safety first of course.

So, to get started, all you do then is peel off a bit of the plastic (in order to reveal the adhesive), spread out the foam across the edge of your fireplace and then push it down and hold it for a few seconds--so that it stays put. Then continue, little by little (peeling and then sticking it down) across the entire edge.


Then when you get to the corner, carefully curve the foam around the corner and hold it in place until the adhesive sticks securely and continue on.


And once your first foam pipe runs out, grab your second pipe, cut it to size, and continue placing it on the rest of the fireplace.


Then, voila!

You've got yourself a much safer fireplace, for less than $4 (technically--since you're not even using 2 full pipes).


And not that it actually LOOKS nice--but hey, I'll sacrifice style at this point to save my baby's head.


And those pretty glass lanterns? Well, baby proofing means that they've made their way to storage too--for now. Because little hands would just love to grab those without a second thought. 


 So our sweet crawling master is now a wee bit safer and I can sleep a wee bit better.

Because just this week she has learned how to stand up.

And so it begins.

Good night everyone,

Erica xo


Thursday 21 January 2016

Oreo peanut butter cheesecake-super easy, super delicious


Sometimes you just need to make something a little decadent.

Something a little bit amazing. Something a little bit delicious.


And although I made this particular cake for a birthday party, an occasion to make it isn't necessarily necessary.


Because this peanut butter Oreo cheesecake will blow your mind.


So if you need a little pick-me-up on these dreary, long January days...this cheesecake will certainly do the trick. And if you've never made a cheesecake before and think it must be hard to make, then this recipe was made just for you.


It's melt-in-your-mouth delicious, with the perfect amount of Oreo crunch on top and strips of peanut butter throughout. And easy easy easy to make.

Pretty much perfection.


So take a minute and indulge. Treat yourself.
And enjoy!

Here is the recipe that I used, copied and pasted from This Gal Cooks.

Ingredients
For the crust
  • 1½ C ground Oreo cookies (about 21 cookies)
  • 1 tbsp granulated sugar
  • ⅓ C butter, melted
For the filling
  • 3 8oz packages of ⅓ less fat cream cheese
  • 1 C creamy peanut butter (do not use natural)
  • 1 C granulate sugar, divided (3/4 C, ¼ C)
  • 3 large eggs, room temp
  • 1 tsp vanilla extract
  • 9 crushed Oreo cookies
For the topping
  • 10 crushed Oreos
  • Hot fudge sauce for drizzling
  • 9 inch springform pan
  • Aluminum foil
Instructions
  1. Preheat oven to 325 (300 for dark pans)
  2. Make the crust by combining the melted butter, sugar and the ground Oreo cookies. Mix in the butter until well incorporated and all of the ground cookies are moist. Press the mixture into the bottom of a 9 inch springform pan. *Note: I would suggest putting a separate pan on the lower rack of your oven to catch any of the drips from the peanut butter seeping through the springform pan.  
  3. In the bowl of a stand mixer, beat together the cream cheese, ¾ C granulated sugar and the vanilla extract on medium speed. Add the eggs one at a time, beating between each addition. Mix in the 9 crushed Oreos and then remove 1½ C of the batter from the mixing bowl and set aside. To the remaining batter, add the peanut butter and the remaining ¼ C sugar and mix on low until well incorporated.
  4. Pour half of the peanut butter batter over the crust and carefully even out and smooth with a spoon. Pour half of the plain batter over the peanut butter layer and carefully even out and smooth with a spoon. Repeat this process until the remaining batter is used. The final layer should be the plain batter.
  5. Bake at 325 degrees for 60-90 minutes or until the center is slightly jiggly. If the top of the cheesecake starts to darken too much, cover with aluminum foil.
  6. After baking, remove the cheesecake from the oven and allow to cool in a fridge overnight. Once cooled, top with the 10 crushed Oreos and then drizzle with the fudge sauce.
Happy baking!!
Erica xo


Thursday 7 January 2016

Saving Christmas


Don't leave. You're in the right place. 

This little blog just got a little face lift.

I figured it was high time that I spent the time to put together some updated pics. 
And high time that I spent some time parked on the couch for a few minutes, staring at this screen. Something that I haven't done in a very long time. Because Christmas, New Years, the flu that knocked me right out and killing myself staining my staircase has taken over my life. Yes, staining my staircase. Oh man. It's a job. One day you'll see before and after pictures...and I might look about 20 years older too when it's all said and done.
     
But, minus the never ending staircase, life is slowly getting back to normal now. The Christmas lights are coming down, the house is back in order, our normal daily routine has started up again and the treats are slowly being eaten out of our cupboards. 

But in the meantime, I didn't want to forget to seal our Christmas pictures in this space. Because in the wash of Christmas craziness, it's easy to leave these pics on my camera and just move ahead. 
Because, to be honest, Christmas can feel like a bit of a blur once it's all said and done. 

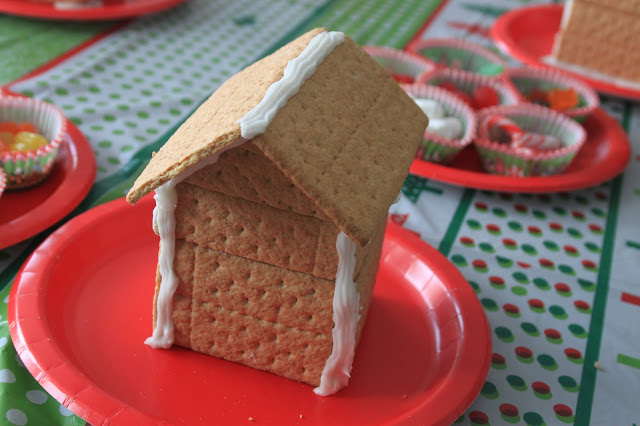
From early Christmas celebrations at our place with Terry's side of the family--where little people decorated gingerbread houses (or, graham cracker houses actually)...


(made out of little milk cartons so they wouldn't fall apart when rough fingers pushed delicious candy onto them) --and where I learned, after breaking at least 20 crackers, that using a BREAD knife to cut these things is key. Good to know.


To sitting around the Christmas tree, opening gifts...


and breaking out all of the new toys.


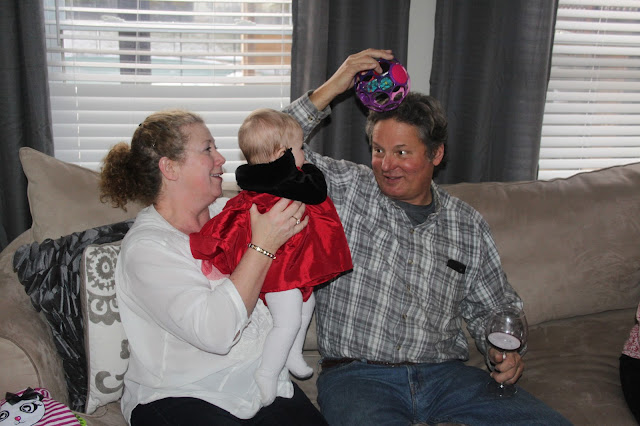
Then in a flash, we were packing our bags and moving into mom and dad's house for the week, as we always do each Christmas with my sister and her family too, and we let the real craziness begin.


So with traditions in full swing, where Santa secretly mailed them a book on Christmas eve to read before bedtime...


and where reindeer food was scattered on the snow grass in case the reindeer were hungry...


and where matching jammies were unwrapped on that big night right before bedtime,


and cookie crumbs were found left over the next morning, our Christmas was full. Because traditions are something that I want the kids to always expect and remember.


So with a week full of gorging on delicious food, cousins and siblings playing nicely one minute, then fighting the next, then making up 2 seconds later, then bouncing off the walls with Christmas excitement...it was a wonderfully full, busy, crazy Christmas.

We're still reeling from the mounds of Christmas cookies that were decorated with Grandma,


the parties that forced us to wipe the baby spit off of our clothes and pretend that we have a night life...


the play dates with school friends just before going back...


and the exhaustion that Christmas and the holidays is bound to bring.

So, here we go--the pictures are now set in this little place of mine, so I can look back one day and remember. Remember the good, the crazy, the exhausting, the wonderful reality of it all.

And to finish it off--a picture just because it makes me smile. Our girl showing off her new skills on all fours, and her tiny friend Ivy. Cutest ever.


Happy first week back to reality everyone.
One more day until the weekend. Hang in there.

Erica


My parents have loved each other for 50 yrs...so we celebrated BIG time

It wasn't my idea. Not mine at all. But hey--if you put an idea in my head, I'll roll with it. So when my dad said he wanted t...